When it comes to concrete work, whether you’re a seasoned contractor or a DIY enthusiast, knowing the essentials can save you time, money, and a whole lot of frustration. Concrete is a versatile and durable material, but getting the best results requires some know-how. This guide will provide you with essential tips and tricks to ensure your concrete projects are successful every time. Choose the best Driveway Contractors Houston.
Before diving into the nitty-gritty of concrete work, it’s crucial to understand what concrete is and how it functions. Concrete is a mixture of cement, water, and aggregates like sand, gravel, or crushed stone. The magic happens when water is added to the cement; a chemical reaction known as hydration occurs, causing the mixture to harden and gain strength over time.
The Chemistry Behind Concrete
Concrete’s strength and durability come from a chemical process called hydration, where water and cement form calcium silicate hydrate, binding the aggregates together. The ratio of water to cement is crucial; too much water can weaken the mix, while too little can make it unworkable. Understanding this chemistry helps in achieving the right consistency and strength.
Types of Aggregates
Aggregates are an essential component of concrete, providing bulk, strength, and stability. The choice of aggregate can affect the concrete’s appearance and performance. Sand provides a smooth finish, while gravel offers strength. Crushed stone is often used for heavy-duty projects. Choosing the right aggregate is crucial for the intended use of your concrete.
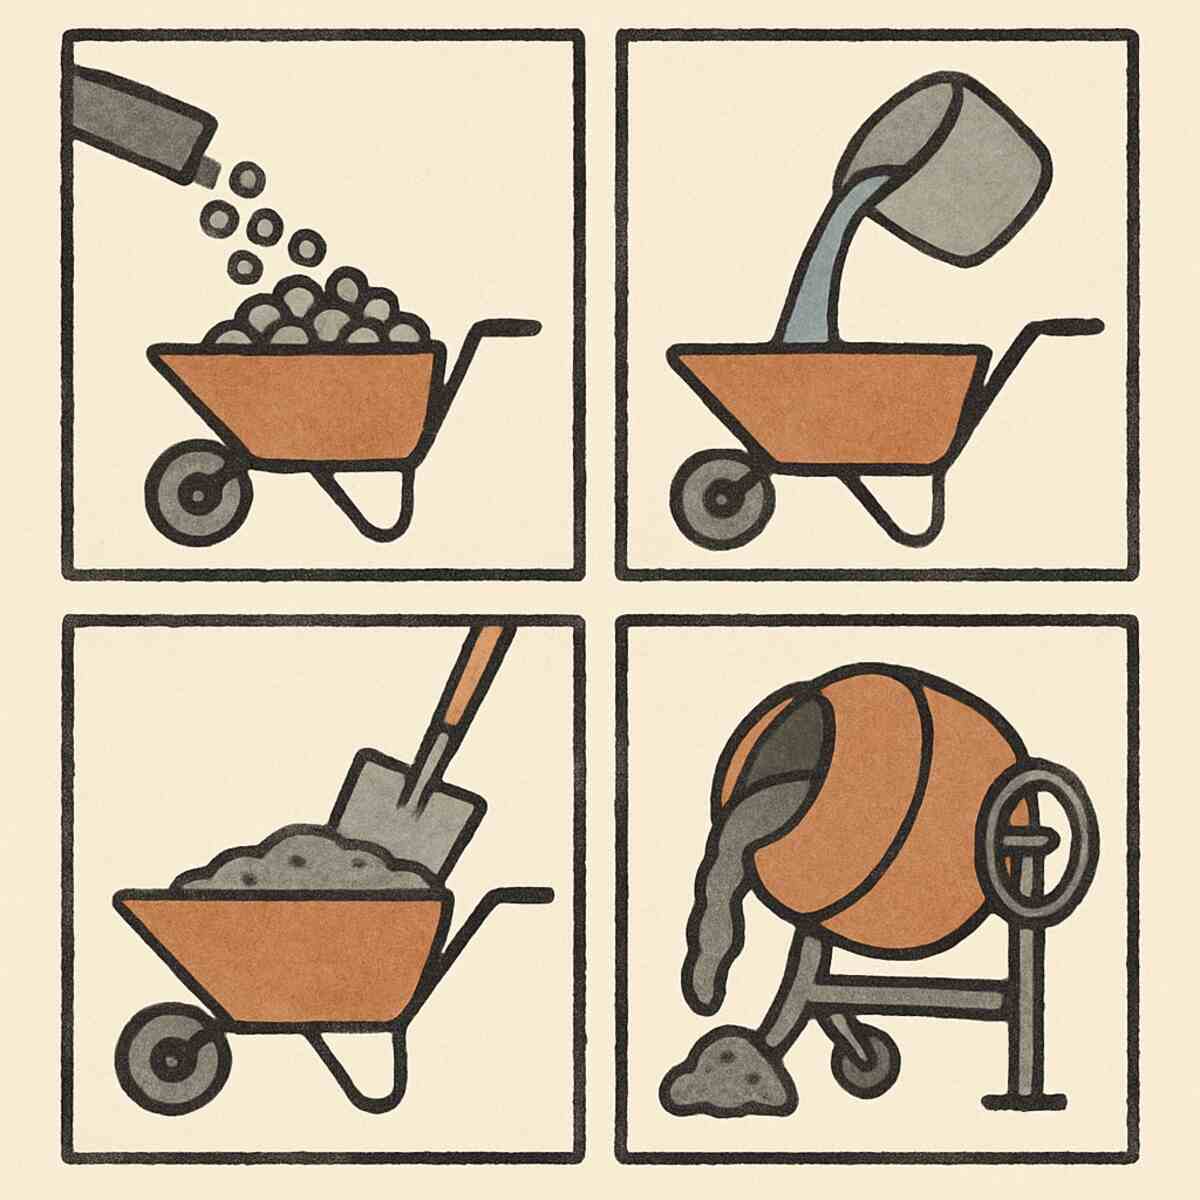
Importance of Proper Mixing
Achieving the right mix is critical. Proper mixing ensures that the cement, water, and aggregates are evenly distributed, which affects the concrete’s final strength and durability. A consistent mix prevents weak spots that could lead to cracking or structural failure. Whether mixing by hand or using a mixer, precision is key.
Choosing the Right Mix
Selecting the right concrete mix is paramount for any project. Different projects require different types of concrete, depending on the load-bearing needs and environmental conditions. For example, a driveway will need a different mix than a patio or a countertop.
Standard Mix for Everyday Projects
The standard mix is a reliable choice for most residential projects such as sidewalks and patios. It provides a balance of strength and workability, making it easy to handle for DIY projects. This mix is ideal for areas that do not experience heavy loads or extreme conditions.
High-Strength Mix for Heavy Loads
When it comes to driveways or industrial floors, a high-strength mix is necessary. This mix is designed to withstand heavy traffic and resist wear and tear. It typically involves a higher cement content and specific aggregates that enhance its durability under stress.
Rapid-Set Mix for Time-Sensitive Projects
For projects that need quick completion, such as repairs or installations in busy areas, a rapid-set mix is ideal. This type of concrete cures faster than standard mixes, allowing for quicker turnaround times. However, it requires careful handling to ensure proper setting and strength.
Preparing the Site
Preparation is key in any construction task, and concrete work is no exception. Proper site preparation ensures longevity and reduces the chance of future repairs.
Thorough Site Inspection
Before you begin, inspect the area where the concrete will be poured. Look for any existing issues such as drainage problems, old concrete, or structural weaknesses. Clearing the site of debris, vegetation, and obstacles is essential to facilitate a smooth pour and even setting.
Planning the Layout
Planning is crucial for successful concrete work. Measure the area accurately and mark out the boundaries. Consider the slope and drainage needs to prevent water accumulation. Having a clear plan helps in gathering the right materials and tools, reducing waste and inefficiencies.
Tools and Materials Checklist
Having the right tools and materials on hand is crucial. Ensure you have all necessary items such as rebar, forms, mixers, and finishing tools before starting. A checklist can help avoid delays and ensures a seamless workflow. Additionally, double-check material quantities to prevent shortages.
Creating a Strong Foundation
A solid foundation is crucial for concrete stability. This means compacting the soil and adding a layer of gravel or crushed stone to improve drainage. Proper drainage prevents water from pooling under the concrete, which can lead to cracking or shifting.
Soil Compaction Techniques
Proper soil compaction is essential for a stable foundation. Use a tamper or plate compactor to ensure the soil is firm and level. Compacted soil prevents settling and provides a solid base for the concrete. This step is critical to avoid future shifts or cracks.
Laying the Gravel Base
A layer of gravel or crushed stone enhances drainage and adds stability. Spread the material evenly and compact it thoroughly. This layer acts as a cushion, absorbing loads and preventing water accumulation. Proper grading ensures that water drains away from the concrete surface.
Installing Forms and Reinforcements
Forms and reinforcements provide shape and strength. Use wooden or metal forms to outline the area, ensuring they are secure and level. Reinforcements like rebar or wire mesh add tensile strength, preventing cracks and structural failure. Proper installation is crucial for the integrity of the concrete.
Pouring and Finishing Concrete
Pouring concrete might seem straightforward, but it’s a step that requires precision and patience.
Mixing the Concrete
Mixing can be done by hand for smaller projects, but larger projects will benefit from a concrete mixer. Ensure that you follow the mix ratios provided by the manufacturer to achieve the desired strength and consistency.
Hand Mixing Techniques
For small projects, hand mixing is often sufficient. Use a large container or wheelbarrow and mix the cement, water, and aggregates thoroughly. Consistency is key; the mix should be uniform and workable. Take your time to ensure all components are evenly distributed.
Using a Concrete Mixer
For larger projects, a concrete mixer is more efficient. Load the mixer with the correct proportions of cement, water, and aggregates. Allow the mixer to run until the mixture achieves a smooth consistency. This method ensures a more consistent mix, reducing the risk of weak spots.
Importance of Mix Ratios
Adhering to the recommended mix ratios is crucial for achieving the desired strength and durability. Different projects require specific ratios depending on load requirements. Always consult the manufacturer’s guidelines and measure components accurately to avoid compromised results.
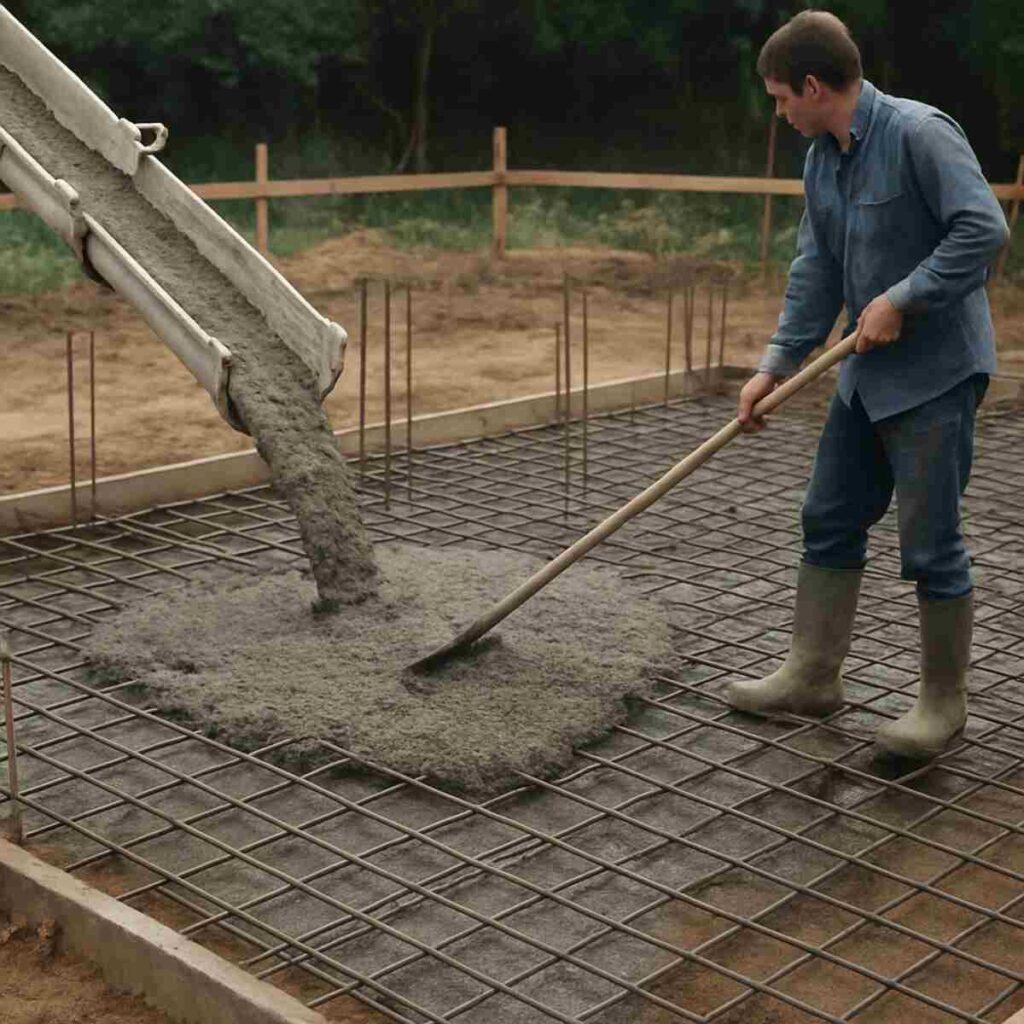
Pouring Techniques
Pour the concrete evenly over the prepared area. Use a shovel or rake to spread the concrete into corners and edges, ensuring there are no air pockets.
Ensuring Even Distribution
Even distribution of concrete is vital to avoid weak points. Pour from the center and spread outwards, using tools to guide the concrete into corners and edges. This ensures that the entire area is covered uniformly, preventing future structural issues.
Managing Air Pockets
Air pockets can weaken the concrete structure. Use a tamping tool or vibratory screed to remove trapped air, ensuring a dense and solid pour. This step is crucial in achieving a durable and long-lasting surface.
Handling Large Pours
Large pours require coordination and teamwork. Divide the area into sections and pour systematically, ensuring each section is completed before moving to the next. This approach prevents drying lines and ensures a smooth, continuous surface.
Leveling and Smoothing
After pouring, use a screed board to level the concrete. This involves dragging the board across the surface to remove excess concrete and fill in low spots. Follow up with a float to smooth the surface and bring water to the top, which helps in finishing.
Using a Screed Board
A screed board is essential for achieving a level surface. Drag the board across the wet concrete, using a back-and-forth motion. This process removes excess material and fills low spots, creating an even base for finishing.
Smoothing with a Float
Floating brings fine aggregates to the surface, creating a smooth finish. Use a magnesium or wooden float in a sweeping motion to achieve a uniform texture. This step is crucial for the appearance and durability of the concrete surface.
Final Touches and Edging
After smoothing, use an edger to create clean, rounded edges. This not only improves aesthetics but also prevents chipping. Pay attention to detail during this step to ensure a professional finish.
Curing: The Secret to Durability
The curing process is what allows concrete to reach its full strength and durability. It’s an often-overlooked step, but crucial for preventing future damage.
Keeping It Moist
Curing involves keeping the concrete moist to continue the chemical reaction. Cover the concrete with a plastic sheet or spray it with water regularly. This process can last anywhere from a few days to a week, depending on the temperature and humidity.
Methods of Moisture Retention
Moisture retention is key to proper curing. Use methods such as covering with burlap, plastic sheets, or applying a curing compound. These techniques prevent moisture loss and ensure the hydration process continues uninterrupted.
Duration of Curing
The curing period can vary based on environmental conditions. Typically, it ranges from 3 to 7 days. Monitoring the temperature and humidity helps determine the exact duration needed for optimal strength.
Importance of Temperature Control
Temperature plays a significant role in curing. In hot conditions, rapid moisture loss can lead to cracks. Conversely, cold temperatures can delay curing. Adjust your curing methods accordingly to maintain a consistent environment.
Avoiding Premature Stress
During the curing phase, it’s important to protect the concrete from any stress, such as heavy weights or vibrations. This is the time when the concrete is most vulnerable to cracking.
Preventing Physical Damage
Keep the area free of foot traffic and heavy equipment during curing. Physical stress can cause cracks and weaken the structure. Use barriers or signage to prevent accidental damage.
Managing Environmental Factors
Environmental factors like wind and sun can affect curing. Use windbreaks or shades to protect the surface. Keeping the environment controlled ensures consistent curing and prevents surface defects.
Monitoring and Adjusting
Regularly check the curing progress and adjust your methods as needed. If you notice any issues, such as cracks or discoloration, address them promptly. Proactive monitoring can prevent small problems from becoming major repairs.
Troubleshooting Common Issues
Even with the best preparation, issues can arise in concrete work. Here are some common problems and how to fix them.
Cracking
Cracks can occur due to several reasons, including rapid drying, temperature fluctuations, or inadequate mixing. To avoid cracking, ensure proper curing and consider adding control joints to manage where cracks will occur naturally.
Causes of Cracking
Understanding the causes of cracking is essential for prevention. Common causes include shrinkage, temperature changes, and structural stress. Identifying the root cause helps in implementing effective solutions.
Preventive Measures
Preventive measures such as proper curing, the use of control joints, and adequate reinforcement can reduce the risk of cracking. Regular maintenance and inspection also help in early detection and repair.
Repairing Cracks
Small cracks can be repaired using epoxy injections or sealants. For larger cracks, more extensive methods like concrete overlays may be needed. Prompt repair prevents further damage and prolongs the life of the structure.
Discoloration
Uneven color can result from inconsistent mixing or using different batches of concrete. To maintain uniform color, mix thoroughly and use the same water source throughout the project.
Causes of Discoloration
Discoloration can be caused by factors such as varying water content, curing conditions, and differences in cement or aggregate sources. Identifying these factors helps in achieving a consistent finish.
Achieving Uniform Color
Ensure uniform color by maintaining consistent mix ratios and using the same water source. Avoid using different batches of concrete in the same project. Consistent curing conditions also contribute to a uniform appearance.
Addressing Discoloration
If discoloration occurs, remedies include applying concrete stains or dyes. Surface treatments can help blend uneven areas, restoring a uniform look. In severe cases, resurfacing may be necessary to achieve the desired appearance.
Repairing Concrete
Concrete repair is essential for maintaining the integrity and appearance of your surfaces. Whether you’re dealing with small cracks or larger structural issues, timely repair can save you from bigger headaches down the road.
Patching Small Cracks
For minor cracks, use a concrete patching compound. Clean the crack thoroughly, apply the compound, and smooth it out with a trowel.
Preparing the Surface
Before patching, clean the crack thoroughly to remove debris and loose material. This ensures the patch adheres properly. Use a wire brush or pressure washer for effective cleaning.
Applying the Patching Compound
Mix the patching compound according to the manufacturer’s instructions. Apply it to the crack, ensuring it fills the entire void. Use a trowel to smooth the surface and blend it with the surrounding concrete.
Finishing and Curing the Patch
Allow the patch to cure according to the product guidelines. Keep it moist to ensure proper adhesion and strength. Once cured, the patch should be level with the existing surface, providing a seamless repair.
Addressing Larger Issues
Larger cracks or structural damage may require more extensive repair techniques, such as resurfacing or using a concrete overlay. In such cases, consulting with a professional concrete contractor is advisable.
Identifying Structural Damage
Structural damage requires careful assessment. Look for signs such as large cracks, settling, or spalling. Identifying the extent of the damage helps in choosing the appropriate repair method.
Resurfacing Techniques
Resurfacing involves applying a new layer of concrete or overlay to the existing surface. This method repairs damage and enhances the appearance. Proper preparation and bonding agents ensure a durable finish.
Professional Consultation
For extensive repairs, consulting a professional is recommended. They can assess the damage, recommend the best repair methods, and ensure the work meets industry standards. Professional repairs enhance safety and longevity.
Conclusion
Mastering the art of concrete work isn’t just about mixing and pouring; it’s about understanding the material, preparing the site, executing the pour with precision, and caring for the finished product. By following these essential tips and tricks, you can ensure your concrete projects are not only successful but also long-lasting.
Whether you’re a DIY enthusiast or a professional contractor, these insights into concrete work will help you achieve the best results every time. Remember, the key to successful concrete work lies in preparation, patience, and attention to detail. Happy concreting!